Slide 1

Slide notes: In this tutorial, we see how to create the necessary Datamarts for IES during a 1st installation of IES.


Slide 2

Slide notes: We use a Console Session and we must be in the QMSYS Account. At the database level, the word "account" is the same as what we call a Datamart in IES. If we issue the command "sort accounts" then the system will respond with a list of current Accounts or Datamarts in the database.


Slide 3

Slide 
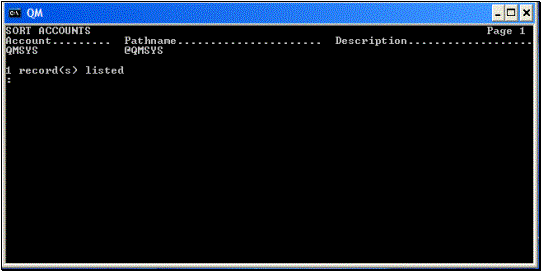
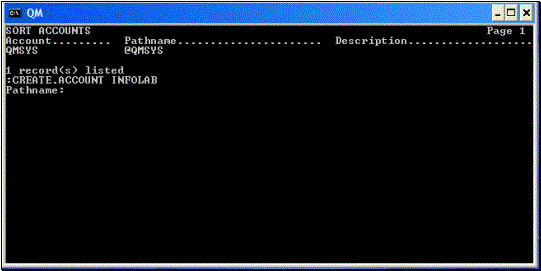
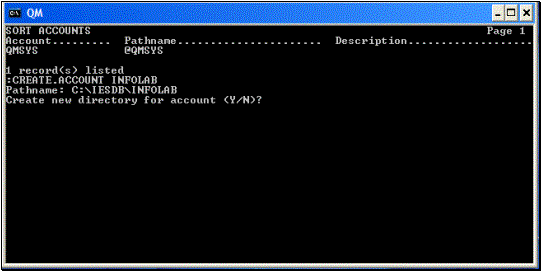
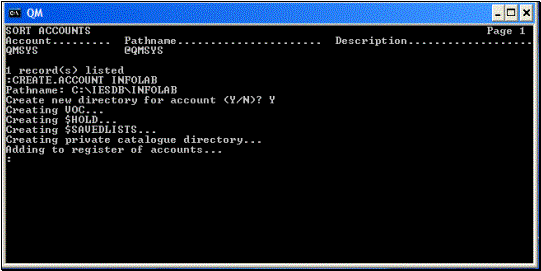
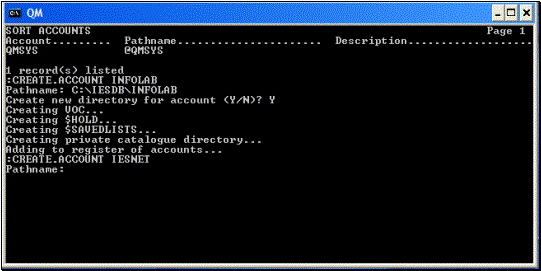
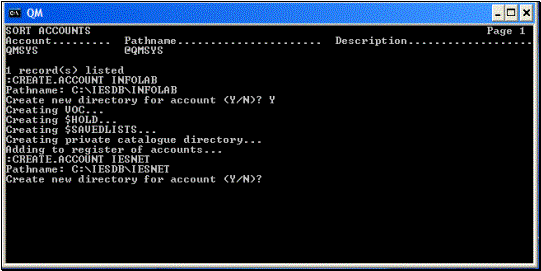
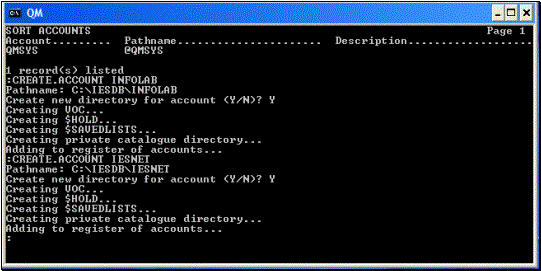
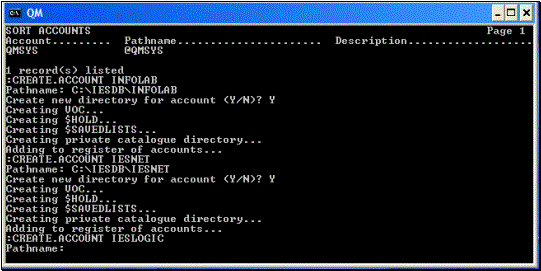
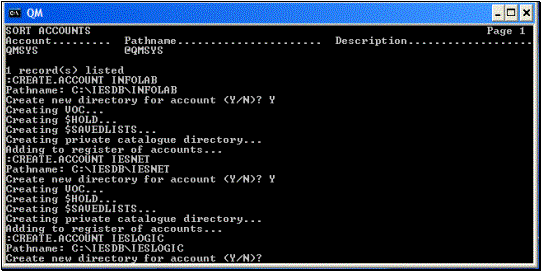
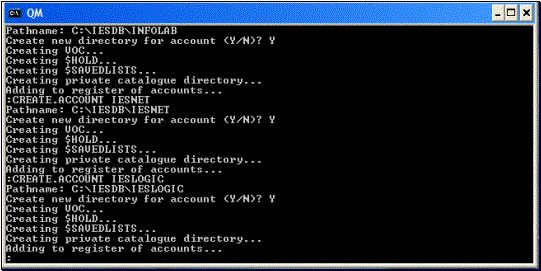
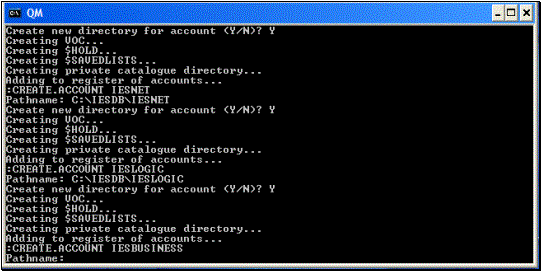
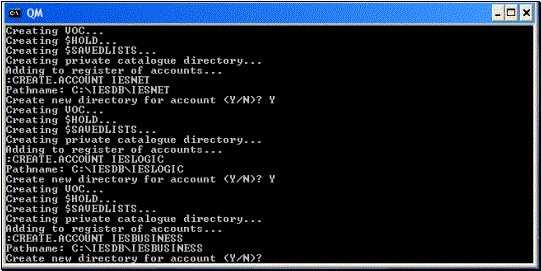
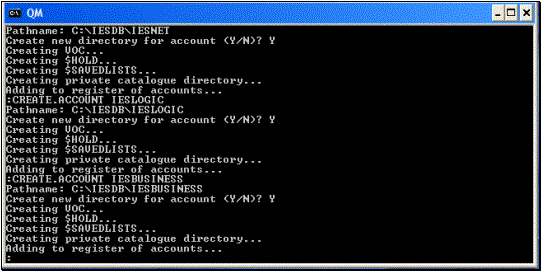
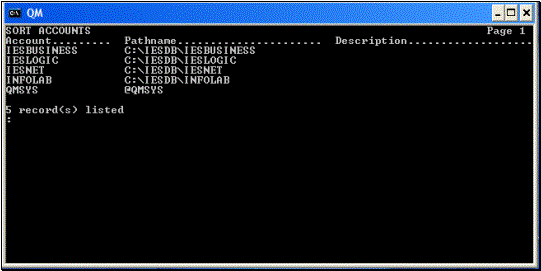
notes: Since it is a new installation, there is currently only the QMSYS account present. The QMSYS account is the master account for the database, and it is automatically created when we install the QM database. We now start by creating the 1st datamart called INFOLAB.


Slide 4

Slide notes: The pathname will be for the drive where our IESDB folder has been created, and is specified as shown here.


Slide 5

Slide notes:


Slide 6

Slide notes: The INFOLAB datamart has now been created and we perform similarly for IESNET.


Slide 7

Slide notes:


Slide 8

Slide notes:


Slide 9

Slide notes: Then we do the IESLOGIC datamart.


Slide 10

Slide notes:


Slide 11

Slide notes:


Slide 12

Slide notes: And then we do the IESBUSINESS datamart.


Slide 13

Slide notes:


Slide 14

Slide notes:


Slide 15

Slide notes: Now when we issue the command "sort accounts" we can see our new 4 datamarts for IES on the list.


Slide 16

Slide notes: These are the minimum datamarts required for IES. Later we can add more datamarts as needed, but this is the minimum initial installation.